Posts

Showing posts with the label how

Create a system repair disc for windows 8 and 10

Image
To create a USB recovery drive Swipe in from the right edge of the screen, and then tap  Search . (If you're using a mouse, point to the lower-right corner of the screen, move the mouse pointer up, and then click  Search .)  Enter  recovery drive  in the search box, and then select  Create a recovery drive .  After the recovery drive tool opens, make sure the  Copy the recovery partition from the PC to the recovery drive  check box is selected, and then select  Next . Insert a USB flash drive into your PC that's at least as large as the size indicated on the screen. Select the USB drive you'd like to use for your recovery drive, then select  Next . Select  Create . The recovery image and necessary recovery tools will be copied to your USB flash drive, which will take a while, depending on your PC and the size of the recovery image. When the process is done, do one of the following: If you want to keep the recovery partition on your PC, select  Finish . I

How to: Repair Windows’ MBR and fix a bricked PC

Image
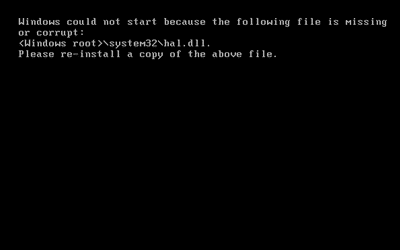
MBR Damaged The main way to Fix the MBR is to use a command prompt and run the bootrec.exe command. In versions of Windows prior to Windows 8 and 10 , you usually accessed the command prompt through recovery media like a DVD disc or USB drive.  When you start boot up a Windows 10 PC it should recognize that there’s a problem and enter ‘automatic repair’ mode.   If that doesn’t happen, but you do see the blue Windows logo, turn off your computer using the hard reset/power button. Keep turning the computer on and off until you see your PC booting into automatic repair. It should only take a few reboots. Once automatic repair mode is ready, you’ll see the Automatic Repair screen. From here select Advanced options. On the next screen, click Troubleshoot and then Advanced options once again. You’ll see a screen with six options.  To use the Boo

Install Microsoft Edge browser extensions

Image
The new feature is just one of many tweaks that Edge needs to compete with more popular browsers such as Google Chrome and Mozilla Firefox. At the time of writing, the number of extensions available for Edge is limited, but you’ll need a few notable ones, including AdBlock, AdBlock Plus and Pocket. Once the Anniversary Update is installed on your PC, here’s how to download and install extensions in Edge.  First, open Microsoft Edge and click on the menu icon (three horizontal dots) in the upper-right corner.  Next, select Extensions from the drop-down menu. This will open a second panel that will show any extensions you already have installed.  Click the link labelled Get Extensions From The Store. The Store app will now open on the dedicated extensions page with all the various extensions you can install in your browser. From here on out, installing extensions works the same way as installing Store apps. Example : You wanted to install AdBlock Plus.  First, C

How to: Stop automatic updates in Windows 10

Image
Step 1, Stop automatic update to use a metered Wi-Fi connection           -> G o to the Start Menu and search for Settings .            -> Choose Networks & Internet and   Select on Wi-Fi           -> Click on the name of Wi-Fi that connected then you will see Metered connection           -> Under Set as metered connection put it On This means it won’t download updates as it could use up your data allowance. This isn’t a global setting though, so if you regularly take your PC to other networks (one at work, for example), then you’ll need to repeat this process when you rst go there, otherwise it will be considered a normal Wi-Fi connection and Windows will run the updates. These settings are all remembered by the system, so once you’ve set them up, the rules will then automatically apply every time you connect to that network. If you ever want to revert back to your normal state, then just turn off the Metered Connection option. 

How to: Add video as your Facebook profile picture

Image
First , Open the Facebook app on your Phone or Tablet          -> Tap on profile picture to go to your profile           -> Tap on the flashing Camera/Video Camera icon Second , Tap on Take a New Profile Video         -> you will to the Camera App,  T apping the red button will             start the recording, which will capture whatever’s onscreen              for seven seconds after an initial three-second countdown.              That video will then play on a loop, so you can preview              what it will look like on your home page.          -> T ap next Third , N ow be able to select a thumbnail.        -> Tap Save  to finish.               Now whenever someone visits your profile on their              iOS device or their computer, they’ll see your                   profile video.  Forth ,  If you want to upload a video, it’ll need to be under seven secon